

Over 90% of first time vehicle owners are not aware of the cabin filter (car air con filter) existence. That includes me as well. Even some of those who own the vehicle for quite a long time didn’t even realize the need for replacing the cabin filter.
My friend first time purchased a vehicle – Mazda 3 from his friend and I told him to check out the cabin filter for replacement. Upon taking out the cabin filter, it’s all mold with lots of ants on it. It makes my friend almost puke.
The air cabin filter acts to filter out dust, physical stuff and even micro-germs for those high end products, just like your home air-conditioning filter.
In HK, over 50% vehicle owners pay the technicians to replace the cabin filters. Most of them do not even know what type of cabin filters they are using. After you read this post, you will realize that it’s actually simple to maintain your vehicle for your better health.
When To Replace?
Every 6 months or a year, or 5000 – 8000 km, depending on your vehicle usage frequency, and environment condition (e.g. dusty road, which make the required replacement period shorter).
It’s difficult to feel the need of replacement physically. In my friends’ case, there is no special foul smell nor weakening of air flow.
I normally changed mine every 3 – 6 months.
How To Replace?
In fact, it’s really easy to replace the cabin filter on your own. The Japanese brands are the easiest while the Europe and US brand takes a bit more time. I will list out the replacement methods for both brands for your reference. All operations are more or less the same for most vehicle models. You should search online for your own specific brand replacement.
Japanese vehicle and China brand vehicle
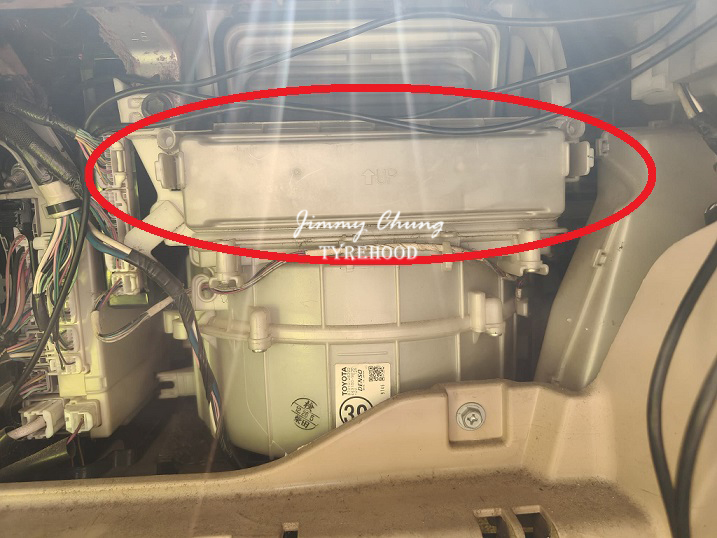
Japanese vehicle e.g. Toyota, Honda, Mazda, Nissan, China brand vehicle e.g. MG. It’s the easiest of all the brands in the market. The cabin filer located behind the glove box (in front of the passenger seat). Simply squeeze both side in, take out the rod located on the (left/right) side, and the glove box will come out.
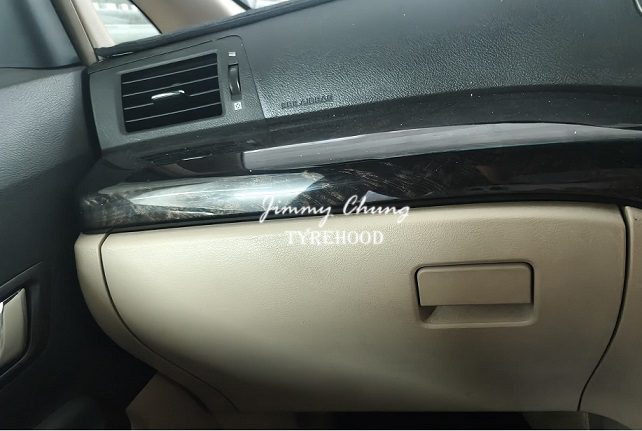
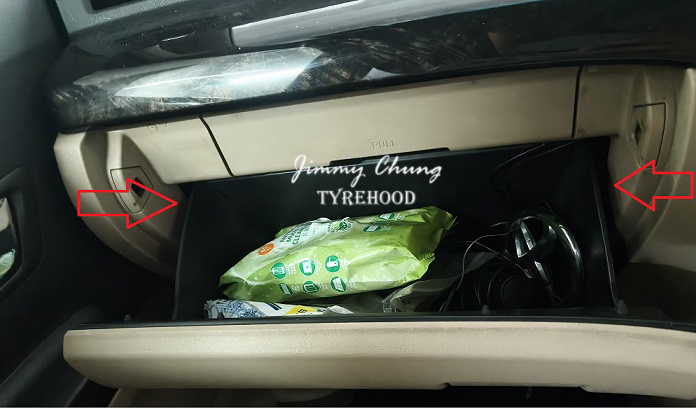
Take out the cap (circled area in the image) and take out the old cabin filter.
Look at the side of the old cabin filter to check the air flow arrow. Put the new one the same way as the old one following the air flow arrow.
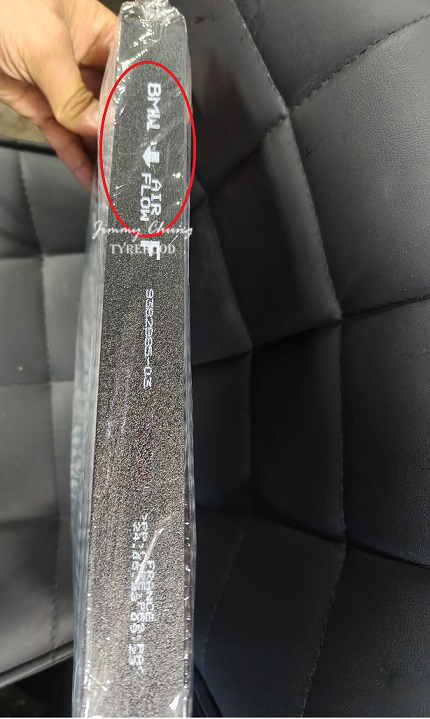
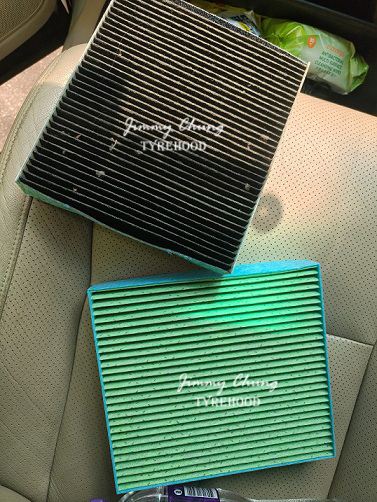
The whole process can be done as quick as 1 minute.
Tools needed: None
Mazda (for some models)
The cabin filter located under the glove box (behind the monitor). You need to remove the cover at the side in order to locate the cabin filter.
Tools needed: “+” screw driver (aka phillips screw driver).
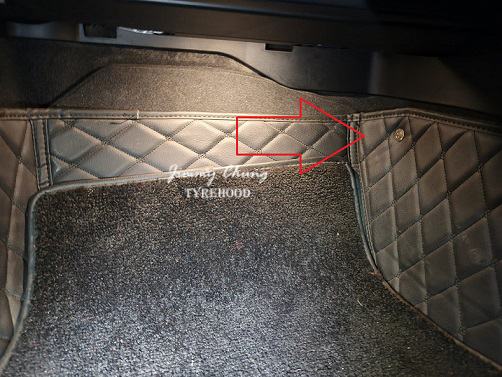
Some other China brand electric vehicles
e.g. BYD. The cabin filter is also located behind the glove box. Just that you may need screw driver to unscrew the cover in order to locate the filter.
Europe and US vehicle
Usually have two cabin filter. One locates outside the vehicle, the other one inside the vehicle, under the glove box.
Locating cabin filter outside the vehicle
Most Mercedes Benz cabin filter is right on top of the 12V automotive battery. It’s very easy to replace once you see it. Others like BMW is somewhere near the windscreen. Different models may have different location but it’s somewhere around the same.
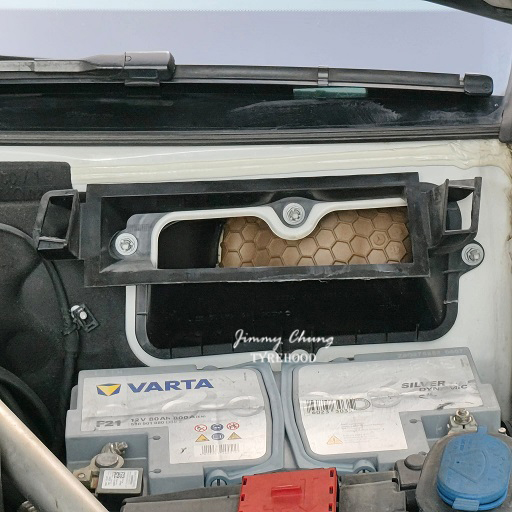
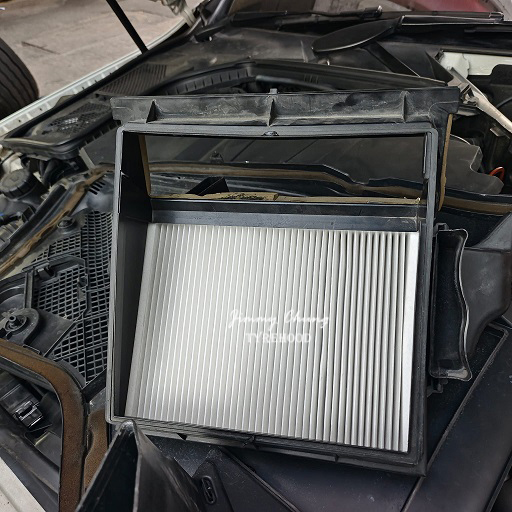
Locating cabin filter inside the vehicle
Tools needed: “+” screw driver or Hex key or Star key
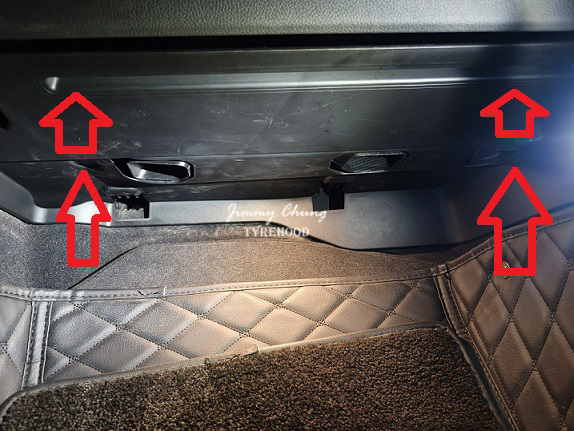
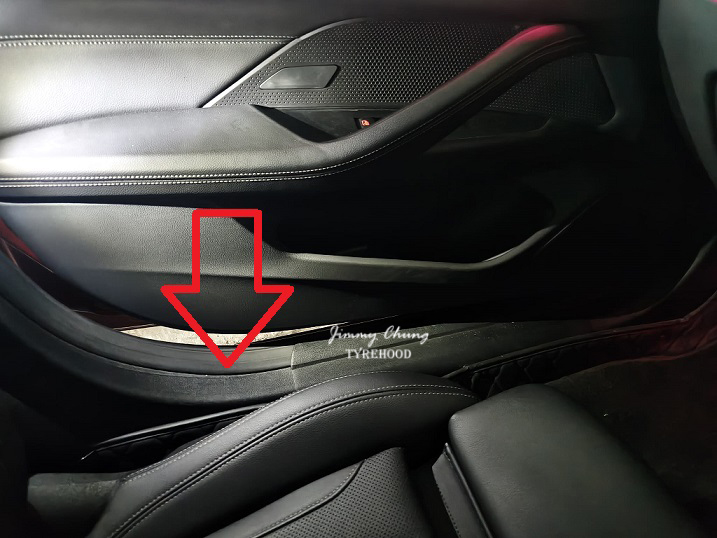
You need to remove the cover under the glove box in order to locate the cabin filter. Screws normally located as pointed in the image. Some models are tightened by plastic screw / button / buckle. These buckle may be damaged upon untightening. You may need to get new ones just in case.
Some models like Mercedes Benz may need to take out the cover at the passenger vehicle before you can take out the cover under the glove box.
Conventional vehicle and Electric vehicle replacement process is similar.
Things to Take Note
- Japan and China brand vehicles cabin filter are normally rectangle in size. Hence, it’s important to get the air flow position right for the perfect air distillation.
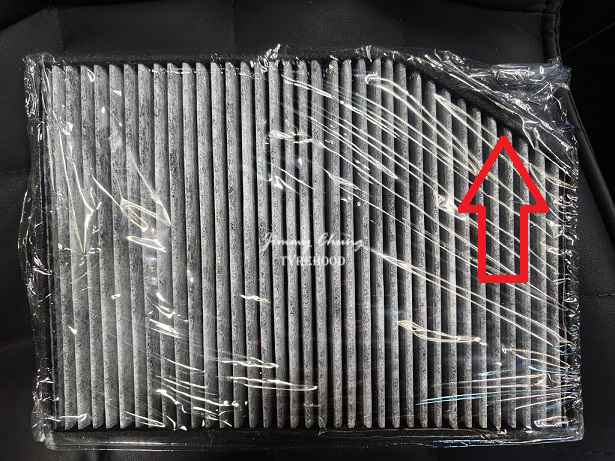
- Europe and US vehicle cabin filter may have different shape (like the image shown). You need to install the same way following the shape of the old one. Otherwise, you can’t fit into it.
- Simply mention your vehicle model and year will get the correct size and shape for your vehicle. Some seller may need your vehicle VIN to confirm the right part.
- Modifying your cabin filter to a smaller one will affect filtering. Getting a larger size can’t fit into it.
- Getting a narrower cabin filter to install two cabin filters won’t help in filtration. Just like wearing two face masks.
- Some Western brands cabin filter cap have direction. You need to cap back following the correct direction, otherwise it cannot cap back.
- Most importantly, don’t screw back too tight. Tighten it just nice will do the job.
- Some vehicle models offer free cabin filter replacement during warranty period and/or upon inspection. You do not need to replace by your own.
How Much Is the Cabin Filter?
As low as HK$15 to as expensive as HK$1xx depending on the brands and functions that it offers. Getting a HK$20 something one is good enough for a decent cabin filter.
Each time you replace your own, you save at least HK$100 labor work (and cabin filter) in just 1 mins (for some Japanese vehicles). For others, it depends on the model. But the whole process can be quick after your first time.
Other related article
-> Tesla TPMS Light on but tyre pressure is fine?
-> (for non Tesla) TPMS Light on but tyre pressure is fine?
